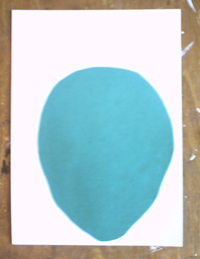
1. Draw the outline of the face on the white card and cut it out.
Leave space at the corner to cut out a square for the nose.
2. If you’re using coloured paper for the face, first draw the face outline on the paper, then cut it out. Stick it onto the white card (see picture), and cut out the card.
3. Measure the distance between the pupils on the actor’s face. Put dots on the card to show where the pupils are. Draw eye shapes around the dots.
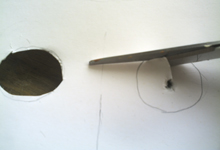
4. Put the card on plasticine and poke holes through the eyes with a sharp pencil. Cut out the eye holes with small scissors.
5. Hold the mask up to the face to make sure the actor can see through the eye holes ok. See where the tip of the nose should be on the card.
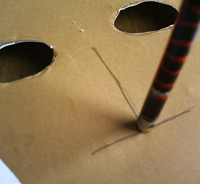
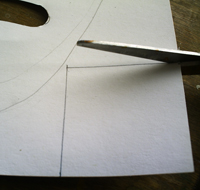
6. Draw lines (as shown below) for where the nose is. The horizontal line should be a bit wider than the actor’s nose. The two lines meet where the tip of the nose is.
7. Using plasticine again poke a hole through where the two lines meet, and cut along both lines.
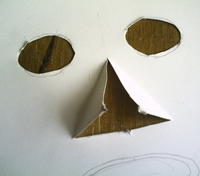
8. Fold back the two triangles. Make sure it fits comfortably on the actor’s face – if it doesn’t, make longer cuts for the nose hole.
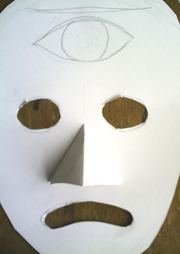
9. Cut a square from the corner of the card (or coloured paper). Fold in half diagonally. This is the nose.
10. Cut one side of the nose piece as shown below so the nose isn’t too long. Glue it on the flaps.

11. Note where the mouth should be on the mask by holding it up to the actor’s face. Draw the mouth on – a sad or happy shape. Poke a pencil through as before and cut out the mouth.
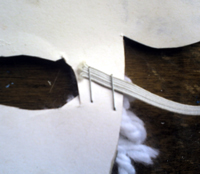
12. Measure a piece of elastic by holding it round the back of the head up to the outer corners of the eyes (without stretching the elastic).
Cut the elastic. Staple it to the back of the mask with two staples (on each side).
13. To attach hair put strips of double sided tape along the top of the mask.
14. Add other details using felt tips, coloured paper, glitter glue, wool for the sheep, and whatever else you can find.